
I spray painted everything with Rustoleum's American Accents in Canyon Black.
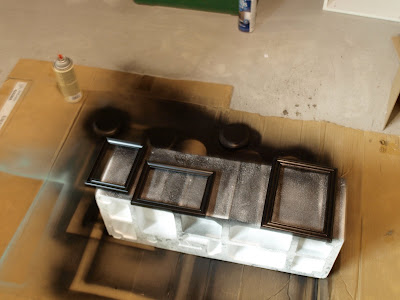
I measured and cut my dowel to the height I wanted the frames to be (I eyeballed it). I think they ended up being 7 inches long.

Then I used some Gorilla Glue Epoxy to secure the frame to the dowel. This was no easy feat. In fact, I had some serious issues. The frame and the dowel did not want to be secured to each other. I managed to set them up on an old piece of styrofoam and tried to get them to stick.

But, every time I walked away or turned my back, this is what I found.

Over and over again the dowel kept falling. I had to get creative! I carried my fussy frame around the house with me until I spotted it- a Wesco (gas station) popcorn bucket. I propped the frame up against it and voila! It stayed!! (Please pardon the messy kitchen in the background.)

I let the frames dry for awhile and I attempted to drill holes in the round wood circles. After my attempts to epoxy the frames to the dowel, I knew I would need to do more to attach it all to the wooden circle, which is why I decided to pull out the hubby's drill.

My only problem was that I didn't have the right drill bit. So, one side of my brain told me to use the bigger drill bit. Yeah. That didn't work out so well. The other side of my brain told me to use a smaller one. That worked better. (Mental note: listen to that side of brain more often.) So I had to paint my mess-up. Time for more Rustoleum American Accents Canyon Black! That's ok, I saved the other wooden circle for a different project I am working on. Reuse and recycle!

Finally! Everything was going great and I was on the home stretch. I chose some pictures to put in each frame. I cleaned the glass, put them into the frame, began to secure the back and... OH NO! NOT AGAIN!
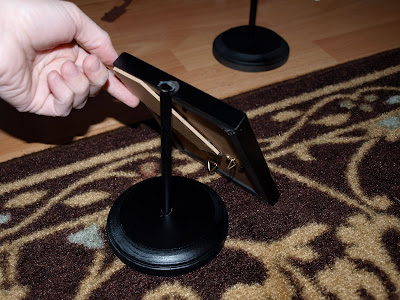
Ok, that's it! All I could do was laugh. And it was definitely time for some hot glue. I fixed the frame and here is the end result.


Not too bad, for all that work, huh?
I will be linking this to:

Metamorphosis Monday
Made it Monday




Bobbypins Boardwalk
Strut Your Stuff Thursday Thrifty Thursday





Cute!
ReplyDeleteAwesome! I'm so going to make these! Mama has a bunch of Christmas pictures that need frames! :)
ReplyDeleteOh my gosh those turned out super cute! Great job!
ReplyDeleteSuch a great idea, I love laerying picture frames... And with out much table-top space, this project would work perfectly for me!
ReplyDeleteThanks for sharing!!
great job! good idea!
ReplyDeletegail
These turned out really cute. No pain, no gain right?
ReplyDeleteFrom a redhead to you: these are cool! Nicely done ad persevered!
ReplyDeleteStop by!
love, kelee
Those turned out so cute!
ReplyDeleteHow cool is that! Great idea! ~Lisa
ReplyDeleteLove this idea! Too cute!!
ReplyDeletefuntocraft.blogspot.com
Great job! Your frames turned out cute!
ReplyDelete:o) Trish
Fun...sometimes we don't give hot glue enough credit! Love how they turned out. Thanks for sharing with Made it Monday! Jules
ReplyDeleteHey I'm on your blog! I feel so special. :-) Super cute frames, crafty Court!
ReplyDeleteThese are fabulous....very clever!
ReplyDeleteGreat idea. They look awesome.
ReplyDeleteWhat a great idea - totally cool.
ReplyDeleteThose turned out so cute! I always want to add height to frames- and those are adorable!
ReplyDeleteVery creative idea, love the drama that the height offers the frames - thanks for sharing such a great idea!
ReplyDeleteWay to keep at it until you got it done! Came out great... Dee Dee
ReplyDeleteVery cute! Proud of you for sticking with it!
ReplyDeleteHugs!
Susan
Hello Courtney(did I get your name right)? I've just strolled in for my first visit...I've enjoyed taking a peek at your past posts. You've got so many wonderful treasures. Your blog is so beautifully inviting.
ReplyDeleteWe share similar taste for so many of the same creative design elements.
As fall came to a close I looked forward to winter (that's fast approaching), bringing a festive inspiration for a few DIY decorations and gifts. With a little baking in between.
Don't you love the aroma that fills the air during this season?
My cat also appreciates the evergreens and an occasional ping pong toss of my (newly created and not yet dried) ornaments...
I've bookmarked you in my favs.
I look forward to coming by your charming blog again.
Come by for a visit. Your company would be nice.
Sweet holiday wishes,
Sara
So Cute what a great idea. They turned out great. Thank goodness for popcorn buckets. lol
ReplyDeleteThat's a great idea! I love that you showed it's not always as easy as 1 2 3 to get a project the way you envisioned it. The great part is that you persevered. You turned what would have been an ordinary picture frame grouping into something very unique and eye-catching. Very clever and I am so happy you shared it on the Boardwalk Bragfest.
ReplyDeleteI love this and will be featuring this on my blog! Good job!!!
ReplyDeleteThese are wonderful! You are so clever!
ReplyDeleteWhat a super cute idea!!!
ReplyDeleteI'm so laughing at you right now because I TOTALLY Understand! I love reading blogs and they show the steps and everything is nice and neat and no problems. THAT IS SO NOT ME! I can't show the "during" pics because they are a disaster, I am a mess and nobody would continue on reading. I can relate to you so much. Love reading it!
ReplyDeleteLove these-so adorable. Thanks for posting to the party.
ReplyDeleteJust an fyi most people are not getting the correct info in their reader-my updates are over 2 weeks old and I have made multiple other posts. I've been on with Google multiple times and they don't have an answer and I am not getting everyones updates in my reader either.
Cheri
Really creative...and I love that it makes your pictures different heights. Don't cha hate when a 'simple' project keeps going haywire??? Glad you could laugh it off and stick with it. They turned out super cute. Feel free to join my weekly Make it for Monday party. Would love to have you :)
ReplyDeleteWhat a clever idea! You can layer pics this way! I would never have come up with this one. Thanks for the extra info in the 'ol internal memory card file bank. :)
ReplyDeleteAnd for linking up to SNS!
FJ Donna
I love these! So much better than just setting a picture out.
ReplyDeleteLOVE the picture frames on the dowels! I love the varying heights! Super cute!!
ReplyDeletewww.rachaelsblossoms.blogspot.com
view it now louis vuitton replica their explanation replica designer bags wholesale have a peek here bags replica gucci
ReplyDelete