Home  |  As Featured On  |  Advertising  |  Parties I Like!  |  Contact Me  |  About  |  Shop


Sunday, March 28, 2010

Bunny Jar (Easter Decor)

A few months ago, I made some pedestal vases. The great thing about these vases is that they can be used year round in all kinds of decorating. So, I decided to switch them out with some Easter decor.

I found some yummy (and cute) Easter candy at the grocery store.


And this is how it turned out.


Pretty cute, huh? It also looks very delectable... In fact, one day I was really hungry for... yup- you guessed it, chocolate. I also decided that I wasn't totally sold on the chocolate bunnies in the jar. So I ate one.

I then replaced it with this...


Adding the blue bow was a nice touch.


They still look good enough to eat, but I don't like white chocolate, so I guess they are safe for now!

I apologize for forgetting my links to the parties I will be joining this week. Click here to see the list. Sorry!!

Sunday, March 21, 2010

Alphabet Balls

I must preface this post by telling you, dear readers, that I will be using the word "balls" a lot. I don't point this out to offend anyone, but, as a high school teacher, I know this word can make most people giggle just a little bit. Come on, admit it, you laughed.

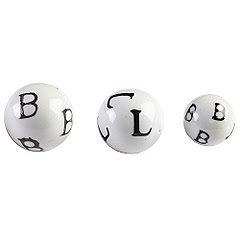
I was walking through Pier One last month and I saw some ceramic decorative balls with letters and numbers on them. I liked them a lot, but they were expensive! They remind me of these from Ballard Designs.
I decided I could make them myself. I went and bought some unfinished wooden balls at Hobby Lobby.


I painted them white with craft paint as a base coat.


Then sprayed the balls with a few coats of spray paint.


I found some clear stamps at Michael's with the alphabet on them. They ended up being perfect for this. I stamped on each letter.


Each letter gets stamped for a total of 6 times. When they are dry, I used a clear finish to spray them with. Balls are round and hard to work with. Notice the trays? They are for Easter eggs! They were purchased at the Dollar Store and worked perfect!


Now, I need something to hold my balls...

I found some candle holders on clearance at Hobby Lobby. I also got the glass containers for half off.


I sprayed them with a glossy black, then glued the glass containers to them. Fill with balls and voila!


Sunday, March 14, 2010

Spring Sign

In case you missed this last week during my blog swap with Life as Lori, here is my Spring Sign.

Spring is almost here on its way and that makes me excited. I find at this time during the year, I crave color. I was wandering through the grocery store the other day and I happened upon this cute green sign. Now, I am a fan of glitter, but I wanted it to look a bit more "springy" with some other colors too, so I decided to alter it!


I started out by lightly sanding some of the glitter off of the original sign. Did I mention I think I have seen these in the unfinished wood/craft section of the Dollar Store? At least they were similar and it would save you a step. Also, I wanted my sign the green color, but you could paint it whatever color you would like before moving on.

I then traced the letters onto scrapbook paper.


I cut out each letter.


Here are my letters all cut out.


I used Mod Podge to glue my letters on to the sign. It was a bit tricky with the glitter behind the paper, but all I had to do was hold the paper on it a bit longer. It all worked out in the end.


I used chipboard, more scrapbook paper and my Cricut to cut out the phrase "has sprung."


I also Mod Podged the scrapbook paper to the chipboard after I had cut it all out. If you don't have a Cricut, I have seen adorable chipboard letters in the scrapbook section of many stores.


I glued my chipboard letters on to the front of the sign for added dimension.


I also added some little pearl stickers in a few different places.


Happy Spring, Everyone!

Friday, March 12, 2010

Blog Swap with Life as Lori

I am so pleased to announce that today we have Lori from Life as Lori on Red Heads Craft More Fun. Lori is uber-talented and I love reading her blog. Speaking of which, when you are done reading Lori's awesome tutorial here, *spring* over to Life as Lori to read a little something from yours truly! Take it away, Lori...

I'm so excited to be here at Red Heads Craft More Fun! I love all of Courtney's craft. Thank you so much for having me over. It's nice to meet all you crafty people!

Hi, I'm Lori from Life As Lori!


I am a wife, mother, daughter, sister, friend, co-worker and probably someone just like you or someone you know. I have been married to my husband Steve for 12 years. My daughter, Emily is 13. She plays basketball for her school, hangs out with her friends and acts like most other 13 year olds! Oh, and somehow, when I'm not working or mothering or friending, I'm the Assistant Basketball Coach for Emily's team!

I love puttering around in my yard and since I started blogging about a year ago, it seems my inner craft bug has decided to creep out.
Enough about me!!!

I wanted to share with y'all my two Easter topiaries!


I bought all of my supplies from Michael's
2 small styrofoam balls
2 sticks (I bought a pack of 8)
3 packs of sparkle Easter eggs(I love all things that sparkle, my dog's name is Sparkles)
2 small hydrangea
2 Easter buckets
glue gun, screwdriver


I painted my sticks brown and then I pushed the ball on the stick.
Take your glue gun (I don't know about you, but I love mine. ) and start glueing the eggs on the styrofoam ball.

It's O.K. that you can still see some of the styrofoam. That's what the flowers are for.

I used a small screwdriver to push the flowers into the styrofoam.
I put floral foam in my bucket and placed the topiary in the foam. I added a ribbon and Easter grass to cover up the foam.

Now you have two Easter egg topiaries! These were really easy and I think they turned out great!

I host a party on Thursdays, called Get Your Craft on Thursday!
Life as Lori


Please stop by and join my party!
Thanks again Courtney for having me over, it's been fun! Hope to see all of you real soon!
Lori

Thank YOU, Lori! I think Sparkles and Tulah should meet! Tulah has been eyeing a sparkly collar, that matches the sparkly Easter eggs, maybe she will find one in her Easter basket this year!

If you haven't been over to Lori's blog, hop over there now, and be sure to come to her Get Your Craft On Party every Thursday, it is always a great time! Speaking of which, I am heading over there now. Ta ta!!

Thursday, March 11, 2010

Blog Swap Tomorrow

Hey y'all! Tomorrow is a big day! It is one day closer to Spring and that means Spring Crafts!! I am excited to announce that I am going to be blog swapping with Lori from Life as Lori. Please *hop* over there to check out my Springy Craft! You're all invited!!

Life as Lori

Sunday, March 7, 2010

Lunch Bag Scrapbook

My cousin was feeling a little under the weather recently, so I decided to make her a little scrapbook out of brown paper lunch bags. Actually, I used purple paper lunch bags because I already had them around the house and I thought they would look cuter. I love how it turned out and she loved it too!


All you need are some pictures, lunch bags, scrapbook paper, and embellishments.

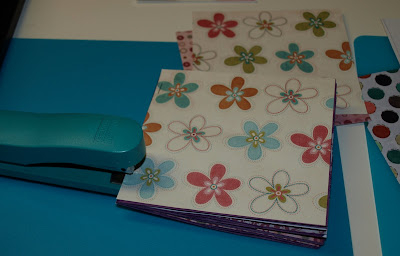
I covered the bags with the scrapbook paper and stapled it like a book.

I used more paper to cover where I had stapled. You could also use ribbon. I just glued mine on.

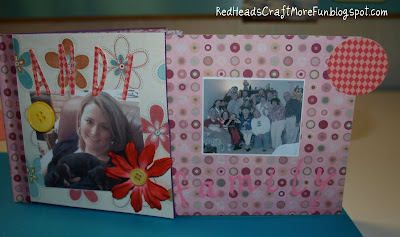
I added some embellishments and it turned out adorable!

I slipped a couple of pictures into the "sleeves" that used to be the paper bag openings.


I also slipped a picture of Edward Cullen with it, because he makes everything better.


Related Posts with Thumbnails