Home  |  As Featured On  |  Advertising  |  Parties I Like!  |  Contact Me  |  About  |  Shop


Sunday, June 27, 2010

My Grandma

My beautiful, sweet Grandma went to be with my Grandpa and to meet Jesus yesterday. I feel very lucky to have known my Grandma for 28 years. We were very close and she is definitely a woman who inspires me.

(My Grandma pictured with her daughters: my Mom and Aunt)

You may remember me mentioning that my grandma was an artist. I certainly got the majority of my art appreciation from her. What I find marvelous about this woman was her ability to look at absolutely anything and find the beauty in it. Often when I was younger, the fabric of my dresses would catch Grandma's eye, and she would point it out to me saying, "look here how these beautiful colors swirl together." No matter how many times she saw the same dress, she would act like it was the prettiest thing she had ever seen.
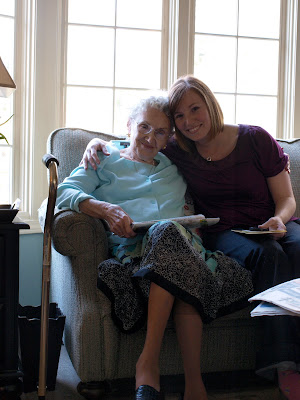
(Me and Grandma)

She had such an appreciation for flowers and would stop to look at the bright colors, or to smell them. She would even stoop to pick them despite our warnings that we did not want her to fall. She just wanted a small trinket from the earth that, in my opinion, would never come close to matching her beauty.

(Grandma appreciating the outdoors)

She loved to hum and sing. I feel very lucky to have one my earliest memories be of me and Grandma sitting on the porch swing at her house rocking. She would sing and hum to me and say to me "penny for your thoughts." As she became older, she would hum all the time. She was content to sit and hum for hours. Sometimes when I watched her hum, I thought it was almost like she was remembering lots of wonderful memories of younger years...

(Grandma helping us sew- she was a wonderful seamstress.)

Grandma was proud. She had 3 children (1 son and 2 daughters), I feel like there may have been no greater joy for her than to watch her children have their own children and in turn, watch the grandchildren grow. There were countless ballet recitals that she attended, she used to drive me to ballet practice a lot. She always listened to classical music and even made a beautiful etching of my ballet shoes.

(My Mom and Grandma)

Grandma loved animals. Animals LOVED Grandma! My dog Tulah, rivaled all the other dogs in the family for the prime spot to sit: on Grandma's warm lap. Grandma always had room for every animal big, or small and always had time to pet or cuddle an animal. When Tulah was a puppy, Grandma would say over and over again, "I could just put this little doggie in my pocket."

(My brother with Tulah, Grandma with Sofie, and me)

(Grandma and the Easter Bunny -yup, that's me dressed up)

She was a true woman, no matter the occasion. She always looked beautiful and was rarely caught without lipstick. Her nails were painted a bright pink, and she would sit with a slight smile on her face and her legs crossed at the ankles.


(My Grandma, Mom and me on my Wedding Day)

One thing is for sure, Grandma will be dearly missed. It has only been a day, but it already feels like it's been too long. I am happy for my Grandma to know that she is in Heaven with my Grandpa. I am grateful for our close relationship and all of that wonderful memories I have of her. These words certainly do not do her justice, but it makes me feel better. Thanks for reading and for your prayers.

(Grandma blowing a kiss)

I love you, Grandma.


Wednesday, June 23, 2010

First Sewing Attempt: Apron

Remember a while back how I said that I wanted to learn how to sew? Well, armed with my Aunt's trusty Kenmore sewing machine and my Mom and Aunt at my side to walk me through the steps, we set out to sew an apron. Mind you, this was supposed to be a simple, "easy" pattern as the package said. Hahahah! I beg to differ.

First off, if you are learning how to sew, and if you are anything like me (excited, focused, etc), you will need a seam ripper! I. used. mine. all. the. time.

Seriously, just when I thought things were going my way, I realized I wasn't sewing all the way through my hem, or my bias tape was slipping off. (Yes, I pinned and pinned and pinned to no avail).

About 20 hours later, (no joke)(ok, maybe a *slight* exaggeration,) I was finished! I couldn't have done it without my Mom and Aunt. The whole process was fun, only because they were doing it with me.


I can't wait to try to make some other things- I am *sew* excited for my newest hobby!

Tuesday, June 15, 2010

Tuesdays with Tulah 5

Who: Uh.. nobody, just this old giftbag.
What: If I told you what was in the bag, it would ruin the surprise!
When: Somebody's birthday
Where: Inside a bag
Why: I would make the best gift ever! Come on, I made you smile at least, didn't I??

Sunday, June 13, 2010

Dollar Tree Jewelry Organizer

With the last week of school and tons of grading to do, I didn't have much time to craft, so I thought I would post what I wrote up for a blog swap I did recently with Scraps and Scribbles, just in case you missed it. :o)

Today I am excited to be sharing with you a fun tutorial on organizing jewelry for a super-cheap price!

Up until recently, the weather in Michigan has been anything but Spring-like, but, I have still felt the need for a little spring cleaning. When I walked into my bedroom, I was faced with this:


My jewelry was in a huge, tangled pile!! Yup, those are even a few necklaces hanging over the tv! Part of me never wants to buy new jewelry because I know I don't take care of it the way I should. Something had to be done.

On a recent trip to The Dollar Tree, I found these cork boards:


I decided to paint them Heirloom White to match the moulding in my room.


I also painted some cup-hooks heirloom white as well.


I trimmed scrapbook paper to fit into the frame of the corkboard. I had to gently push it to fit into the opening. It took some finesse, but with a little patience, I got it to work out.


I screwed the cup-hooks into the bottom of the frame.


Hang 'em on the wall and then organize that jewelry!


What I like about this idea is if I ever get sick of the blue paper, or if I repaint the room, all I have to do is cut new scrapbook paper out and I can switch it up!


Looks like I have some room for more jewelry... maybe I can finally buy some now that I have a place to safely store it!

I will be posting at these lovely parties.

Organize and Decorate Everything

Tuesday, June 8, 2010

Tuesdays with Tulah 4

Who: Summertime Sausage
What: Strolling in the heat
When: Last summer
Where: On the dock
Why: I was headed out for a paddleboat ride when I realized my legs suddenly weren't long enough to reach the paddles- that's ok, I don't like the water anyway!!

Sunday, June 6, 2010

Scrapbook Frames

When one of my good friends sent me the very first (ultrasound) pic of her baby, I wanted to make her a frame to capture the little miracle.

Off to the Dollar Tree I went and I found this thing:


I cut off the string that is on it and then trimmed some scrapbook paper that I could wrap and glue around it. I used three different patterns.


I put a new ribbon through the old holes and cut a piece of white paper to fit on the back to "hide" where I wrapped the scrapbook paper. I hot glued on.


On the front, I hot glued a bull dog clip. I am not sure if there is another name for these, but you can buy them at office supply stores and even grocery stores. Mine happened to have a magnet (the round part of it), but I would have preferred to have one without - there is no need for the magnet part.


I took a piece of glass from the 4X6 Dollar Tree frame like this one:


And put it under the clip with the ultrasound picture. I also cut out the words "ultra cute" and put at the bottom of the frame.


I cut out an initial to cover the clip. You could also use a button or something else to spruce it up.


Here is the finished product (with baby's named blacked out, just in case the cat isn't totally out of the bag yet):


I like it so much that I made one for my mother-in-law for Mother's Day. She loves to take pictures, so I knew she would have just the right one for this frame:


This time I added a button on the clip for a little added pizzaz!


Wednesday, June 2, 2010

Blog Swap with Scraps and Scribbles

Hey All! I have an exciting treat for you today, it's a blog swap with Courtney from Scraps and Scribbles!! Check out her adorable tutorial below and show her some love by visiting her adorable blog. Who knows, you just might run into me over there... :o)


Hello and happy Wednesday to all of you lovely Red Heads Craft More Fun readers. I'm Courtney from Scraps and Scribbles and I'm tickled pink to be guest blogging over at Red Heads today. This is my very first blog swap and what a better place to start than here on Courtney's blog. Isn't she just amazing?! And I love her name ; ) Just a bit about me: I'm a stay-at-home mom to one wonderful little boy. He's almost 18 months and keeps me very busy. When I'm not chasing him around the house, I like to craft, cook, sew and take photographs. I've been married to my sweet husband for close to 4 1/2 years and it's been great! He is truly the love of my life. We love spending our weekends exploring the great outdoors or having a nice lazy day at the beach here in Florida. If you're really curious, you can found out more about me on my blog : )


Silverware Garden Markers


Today I'm sharing with you how to make your very own garden markers from old silverware. I've been seeing these popping up everywhere and decided to put my own spin on them. It's a cheap, easy and fast way to dress up any garden! To make yours, you'll need:


Various assorted silverware

Drawing paper

Fine-tip permanent marker

Mod podge and brush

Glue stick


I found a whole bunch of silverware at Goodwill for $1 a bundle and I got 4 HUGE bundles (I've got some other silverware-related projects I'd like to do so I stocked up.) I started by going through my silverware and choosing the ones I thought would work best. I used 4 spoons and 4 forks.


Then, I traced around the top part of one of the spoons on the drawing paper


to give myself a rough idea of how big the labels should be.


Then I wrote out the label (I actually ended up not using this one, so if you don't see it and get confused, you know why.) Then I tore the paper around the word, leaving a small border and glued it onto the spoon.


Or in this case, fork. See I left enough around the word so if I needed to trim it down a little bit more, I could. I then painted on a thin layer of Mod Podge. This seals it and keeps water from ruining the paper.


Let the Mod Podge dry completely, which should take about 20 minutes.


Then stick them in your garden! And that's it! They're really fast and easy-which is how I like things. This is my little herb garden that I've got going on our balcony.


Hope you've enjoyed this tutorial! It's been a pleasure visiting and I hope you come by and see me over at Scraps and Scribbles!


Love, Courtney


Thanks for the adorable idea! You have inspired me to unleash my inner green thumb!
Related Posts with Thumbnails