Home  |  As Featured On  |  Advertising  |  Parties I Like!  |  Contact Me  |  About  |  Shop


Monday, September 27, 2010

Soldered Necklaces

Look what I learned how to make! Soldered necklaces! I never thought I could solder without burning myself, but, it can be done!

For my first necklace, I made it using an image of Frida Kahlo and some of her artwork, as well as an old postage stamp from Mexico. It was easier than I thought.

I will post a tutorial soon, but until then, enjoy the pics!


And here's one of Tulah acting as a lovely model.

I can't wait to make more! Christmas gifts, anyone??

Wednesday, September 22, 2010

Move Over Henry VIII...

There's a new head hunter in town! I hope I'm not getting aHEAD of myself, but here is a sneaky preview of what I've been working on. It's too early to tell if it is going to be spooktacular or if it will make you laugh your *head* off. I hope to have it done and show it to you on Sunday...


Sunday, September 19, 2010

Red Chair Makeover

I have been fixing up a crafty area in my house for awhile now. I decided I needed to refinish a chair that I could set things on sit in when I craft.

I found this old chair at a Salvation Army.

I removed the cushion and sanded the chair.

I wanted to paint it a glossy red color.

I put a couple coats on it...

While that was drying, I ripped off the old cushion.

I traced it on the new (recycled) foam I was going to use. (My mom helped me, thanks Mom!)

Here are all the layers.

Time to staple everything together.

Trim it up.

Staple on the fabric.

Trim it up again.

Put it all back together.


A lovely place to sit.

Sunday, September 12, 2010

Custom Made Envelopes

I love writing notes. I used to write notes all the time for my parents and leave them in fun places and now I do it for my husband. I would even make little envelopes to put them in. The other day, I made a card for my friend's birthday (Happy birthday Anne!), but I realized I didn't have an envelope to send it in. That's when I thought I could make one.

1. I found a nice page out of a magazine and began to fold.

2. Fold one side of the paper over about an inch, then slip the card to that side.

3. Then fold the right side over the top (it will probably hang over).

4. Trim off the excess paper that was hanging over.

5. Unfold everything and fold up the bottom.

6. Trim the top of the envelope, but not all the way (this is going to be the flap of the envelope. If you are unsure, check out the next pic before cutting.

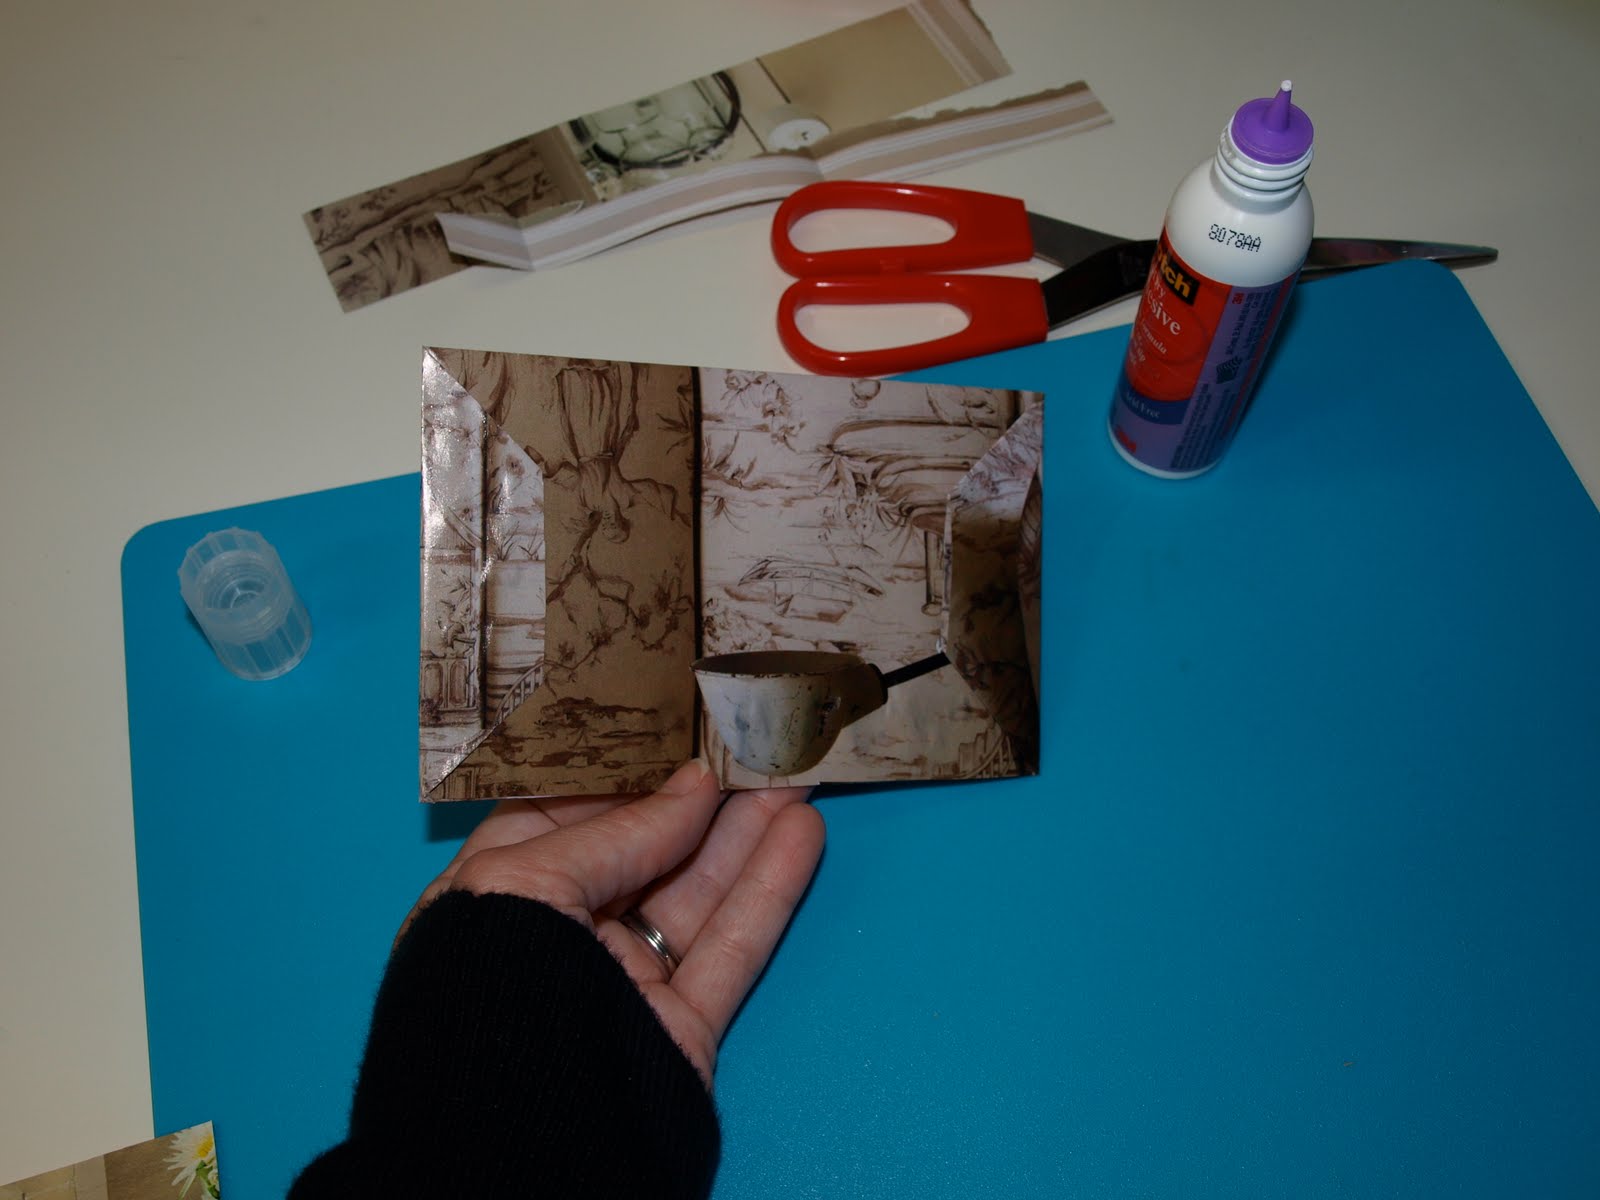
7. This is the rough template you are going for.

8. Put the card back into the "envelope."

9. Put some glue on the left side.

10. Press closed.

11. Fold up the bottom like you are wrapping a gift.

12. Use some glue to secure the bottom.

13. At this point make sure your card is really in the envelope. Then fold the top flap just like you did the bottom.

14. Here is a picture of what the back looks like.

15. Find another piece of paper or a label to put on the front and address it to the lucky recipient.


What a great way to recycle some old magazine pages and spread some cheer!

I will be linking up to these parties this week.

Oh, and Anne, if you are reading this, your card is a little late, but I hope you had a great birthday today!!

Friday, September 10, 2010

Join The Club (RHCMF Flickr Group)

Hola Amigos! Red Heads Craft More Fun now has a Flickr Group! Join in and link up some inspirational pictures that make people say "Wow!"

+ = FUN!

See ya there!

Sunday, September 5, 2010

Golf Towel

This summer, the hubby got new golf clubs. Lucky Man! So, when he asked me to make him a golf towel to go with the new clubs, how could I resist a new sewing challenge?

Off to JoAnn's we went so that he could pick out the fabric of his choice. He found a brown terry cloth, and a stripped one to match.

I used an old dish towel and the hubby's eyeballs as a guide for how big to cut my pieces. I put my pieces right side together and sewed all around them with a 1/2" seam allowance (you can use any seam allowance). Don't forget to leave a small opening to turn it right-side out.

Here is a picture of it while it is still inside out:

Don't forget to trim your corners. At this point I may have forgotten to take a picture due to the fact that when I trimmed my corners, I also trimmed off the tip of my thumb. Never fear, it has healed and feels a lot better!

At this point, turn it all right-side out and push out your corners. Sew the opening closed, and you will notice your towel billows because it is two layers. What I decided to do was to sew down all the brown stripes the length of the towel. This holds the two layers together. If you use fabric that is not like mine, your stitches will show. This wouldn't bother me, but I wanted to let you know in advance in case something like that bothers you. I used brown thread, so my stitches don't show. Another option would be to sew a giant "X" shape on the whole towel.

Now it is time to add the grommet. Puncture a hole in the fabric and put your grommet pieces together and hammer.

We weren't sure what to use to attach the towel to the golf bag, but I found one of these old binder rings, and that did the trick.

Hubby liked the golf towel so much, that I ended up making one for his dad (my father-in-law). Talk about a great Father's Day gift too.


Happy swinging!

I will be linking up to these parties this week.

Related Posts with Thumbnails