Home  |  As Featured On  |  Advertising  |  Parties I Like!  |  Contact Me  |  About  |  Shop


Showing posts with label scrapbook. Show all posts

Sunday, June 13, 2010

Dollar Tree Jewelry Organizer

With the last week of school and tons of grading to do, I didn't have much time to craft, so I thought I would post what I wrote up for a blog swap I did recently with Scraps and Scribbles, just in case you missed it. :o)

Today I am excited to be sharing with you a fun tutorial on organizing jewelry for a super-cheap price!

Up until recently, the weather in Michigan has been anything but Spring-like, but, I have still felt the need for a little spring cleaning. When I walked into my bedroom, I was faced with this:


My jewelry was in a huge, tangled pile!! Yup, those are even a few necklaces hanging over the tv! Part of me never wants to buy new jewelry because I know I don't take care of it the way I should. Something had to be done.

On a recent trip to The Dollar Tree, I found these cork boards:


I decided to paint them Heirloom White to match the moulding in my room.


I also painted some cup-hooks heirloom white as well.


I trimmed scrapbook paper to fit into the frame of the corkboard. I had to gently push it to fit into the opening. It took some finesse, but with a little patience, I got it to work out.


I screwed the cup-hooks into the bottom of the frame.


Hang 'em on the wall and then organize that jewelry!


What I like about this idea is if I ever get sick of the blue paper, or if I repaint the room, all I have to do is cut new scrapbook paper out and I can switch it up!


Looks like I have some room for more jewelry... maybe I can finally buy some now that I have a place to safely store it!

I will be posting at these lovely parties.

Organize and Decorate Everything

Sunday, June 6, 2010

Scrapbook Frames

When one of my good friends sent me the very first (ultrasound) pic of her baby, I wanted to make her a frame to capture the little miracle.

Off to the Dollar Tree I went and I found this thing:


I cut off the string that is on it and then trimmed some scrapbook paper that I could wrap and glue around it. I used three different patterns.


I put a new ribbon through the old holes and cut a piece of white paper to fit on the back to "hide" where I wrapped the scrapbook paper. I hot glued on.


On the front, I hot glued a bull dog clip. I am not sure if there is another name for these, but you can buy them at office supply stores and even grocery stores. Mine happened to have a magnet (the round part of it), but I would have preferred to have one without - there is no need for the magnet part.


I took a piece of glass from the 4X6 Dollar Tree frame like this one:


And put it under the clip with the ultrasound picture. I also cut out the words "ultra cute" and put at the bottom of the frame.


I cut out an initial to cover the clip. You could also use a button or something else to spruce it up.


Here is the finished product (with baby's named blacked out, just in case the cat isn't totally out of the bag yet):


I like it so much that I made one for my mother-in-law for Mother's Day. She loves to take pictures, so I knew she would have just the right one for this frame:


This time I added a button on the clip for a little added pizzaz!


Sunday, March 14, 2010

Spring Sign

In case you missed this last week during my blog swap with Life as Lori, here is my Spring Sign.

Spring is almost here on its way and that makes me excited. I find at this time during the year, I crave color. I was wandering through the grocery store the other day and I happened upon this cute green sign. Now, I am a fan of glitter, but I wanted it to look a bit more "springy" with some other colors too, so I decided to alter it!


I started out by lightly sanding some of the glitter off of the original sign. Did I mention I think I have seen these in the unfinished wood/craft section of the Dollar Store? At least they were similar and it would save you a step. Also, I wanted my sign the green color, but you could paint it whatever color you would like before moving on.

I then traced the letters onto scrapbook paper.


I cut out each letter.


Here are my letters all cut out.


I used Mod Podge to glue my letters on to the sign. It was a bit tricky with the glitter behind the paper, but all I had to do was hold the paper on it a bit longer. It all worked out in the end.


I used chipboard, more scrapbook paper and my Cricut to cut out the phrase "has sprung."


I also Mod Podged the scrapbook paper to the chipboard after I had cut it all out. If you don't have a Cricut, I have seen adorable chipboard letters in the scrapbook section of many stores.


I glued my chipboard letters on to the front of the sign for added dimension.

I also added some little pearl stickers in a few different places.


Happy Spring, Everyone!

Sunday, March 7, 2010

Lunch Bag Scrapbook

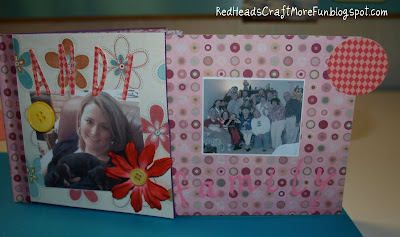
My cousin was feeling a little under the weather recently, so I decided to make her a little scrapbook out of brown paper lunch bags. Actually, I used purple paper lunch bags because I already had them around the house and I thought they would look cuter. I love how it turned out and she loved it too!


All you need are some pictures, lunch bags, scrapbook paper, and embellishments.

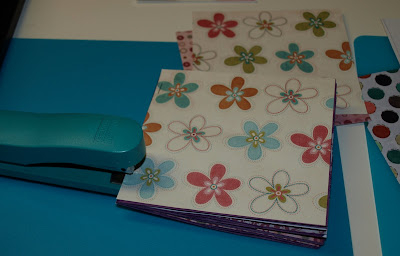
I covered the bags with the scrapbook paper and stapled it like a book.

I used more paper to cover where I had stapled. You could also use ribbon. I just glued mine on.

I added some embellishments and it turned out adorable!

I slipped a couple of pictures into the "sleeves" that used to be the paper bag openings.


I also slipped a picture of Edward Cullen with it, because he makes everything better.


Related Posts with Thumbnails