Home  |  As Featured On  |  Advertising  |  Parties I Like!  |  Contact Me  |  About  |  Shop


Showing posts with label Dollar Store. Show all posts

Sunday, June 13, 2010

Dollar Tree Jewelry Organizer

With the last week of school and tons of grading to do, I didn't have much time to craft, so I thought I would post what I wrote up for a blog swap I did recently with Scraps and Scribbles, just in case you missed it. :o)

Today I am excited to be sharing with you a fun tutorial on organizing jewelry for a super-cheap price!

Up until recently, the weather in Michigan has been anything but Spring-like, but, I have still felt the need for a little spring cleaning. When I walked into my bedroom, I was faced with this:


My jewelry was in a huge, tangled pile!! Yup, those are even a few necklaces hanging over the tv! Part of me never wants to buy new jewelry because I know I don't take care of it the way I should. Something had to be done.

On a recent trip to The Dollar Tree, I found these cork boards:


I decided to paint them Heirloom White to match the moulding in my room.


I also painted some cup-hooks heirloom white as well.


I trimmed scrapbook paper to fit into the frame of the corkboard. I had to gently push it to fit into the opening. It took some finesse, but with a little patience, I got it to work out.


I screwed the cup-hooks into the bottom of the frame.


Hang 'em on the wall and then organize that jewelry!


What I like about this idea is if I ever get sick of the blue paper, or if I repaint the room, all I have to do is cut new scrapbook paper out and I can switch it up!


Looks like I have some room for more jewelry... maybe I can finally buy some now that I have a place to safely store it!

I will be posting at these lovely parties.

Organize and Decorate Everything

Sunday, June 6, 2010

Scrapbook Frames

When one of my good friends sent me the very first (ultrasound) pic of her baby, I wanted to make her a frame to capture the little miracle.

Off to the Dollar Tree I went and I found this thing:


I cut off the string that is on it and then trimmed some scrapbook paper that I could wrap and glue around it. I used three different patterns.


I put a new ribbon through the old holes and cut a piece of white paper to fit on the back to "hide" where I wrapped the scrapbook paper. I hot glued on.


On the front, I hot glued a bull dog clip. I am not sure if there is another name for these, but you can buy them at office supply stores and even grocery stores. Mine happened to have a magnet (the round part of it), but I would have preferred to have one without - there is no need for the magnet part.


I took a piece of glass from the 4X6 Dollar Tree frame like this one:


And put it under the clip with the ultrasound picture. I also cut out the words "ultra cute" and put at the bottom of the frame.


I cut out an initial to cover the clip. You could also use a button or something else to spruce it up.


Here is the finished product (with baby's named blacked out, just in case the cat isn't totally out of the bag yet):


I like it so much that I made one for my mother-in-law for Mother's Day. She loves to take pictures, so I knew she would have just the right one for this frame:


This time I added a button on the clip for a little added pizzaz!


Sunday, May 23, 2010

Floating Frame Spring Plaque

Did you see the Dollar Tree floating frame address plaque I made? Well, here is something similar.

This was a simple, fun project I did to give as a gift to my Sister-in-Law for Mother's Day. It would be so simple to make for any season or any reason (hey- that rhymes!).

I used a floating frame from the Dollar Tree and painted it black (it would also be adorable white). Then I used my cricut and some adhesive paper to cut out the word "Spring" and a little birdie. (Am I obsessed with birdies or what?)


If you don't have a Cricut, you could use cute stickers. So easy!
Sunday, May 16, 2010

Floating Frame Address Plaque

Have you seen the awesome floating frames at the Dollar Tree?? They look like this:


Did you know the word "Love" is stuck to one of the pieces of glass, but if you run it under hot water, it comes right off- no scrubbing necessary?!?


So, I decided to paint the frame black.


Then I used my cricut to cut out some address numbers. I used some adhesive paper so that it acted like stickers. I also used the cricut mat to help me place the numbers onto one of the pieces of glass.


Put it back in the frame and you have a nice housewarming gift, or a Mother's Day gift, etc.


Sunday, April 25, 2010

Spring Birdies Part 3

If you missed Part 1 and Part 2 of my birdie series, please *fly* over and check them out. The last birdie that I found at the Dollar Store was this little guy.


I started out by spray painting him Heirloom White. And then dry-brushing him with a fun blue color.


I also bought this cute candle holder at the Dollar Store too and painted it Heirloom White as well.


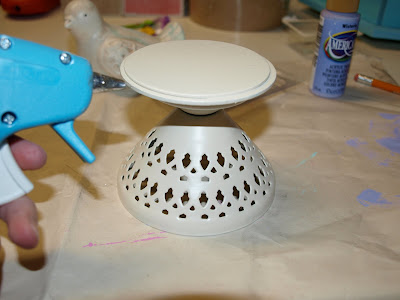
I flipped the Dollar Store candle holder upside down and I hot glued a small, round piece of wood that was also painted Heirloom White to the bottom.


I forgot to mention above, but I also Ralphied the bird because I did not like how the blue dry-brushed onto the bird.


I placed him on the candle holder and was going to glue him down, but decided I might want to use it for other things in the future, so for now, he just perches on it with his little friend.


Sunday, April 18, 2010

Spring Birdies Part 2

My obsession with little birdies continues... if you missed part one, click here. The other little birdie I found at the Dollar Store was not a part of my color-scheme at all.


So again, I white-washed it.


And dry-brushed it with blue.


Want a house for your birds? Check out my Pedestal Birdhouse Tutorial here.


Related Posts with Thumbnails