Home  |  As Featured On  |  Advertising  |  Parties I Like!  |  Contact Me  |  About  |  Shop


Showing posts with label furniture. Show all posts

Sunday, March 11, 2012

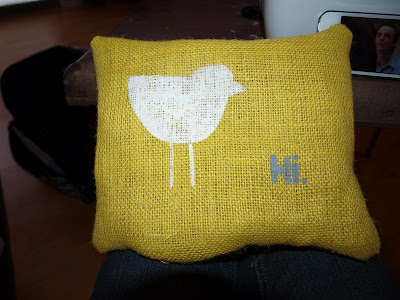
Hello Birdie.

Did you know they make yellow burlap? Amazing! When I saw it, I knew exactly what I had to do. I made a pillow.

You can cut your burlap to whatever size you want. Mine was pretty small, like 6"x9"ish.

I then created a stencil using my Silhouette.

I stenciled it on using white and grey.

I put the right sides of my pillow together and sewed around it, leaving an opening so that I could stuff it. Don't forget to clip the corners.

I then stuffed my pillow with grocery bags (recycled material) and finished sewing it closed.

I made it as a gift to my bestie. She and I took a chair reupholstery class and she wanted to put it on her chair. It's super cute. Look how adorable her chair turned out!


I'll be linking to these parties this week. Spring is in the air!!

Sunday, February 26, 2012

Antique Drum Table

So now that you know about my little obsession with Annie Sloan paint and you also know about my other obsession with going to estate sales, I thought I would show you the marriage of my two obsessions...

Enter one antique wooden drum table bought at estate sale. She's a beauty, right?

Enter a couple coats of Annie Sloan's Pure White Chalk Paint...

Distress and wax to liking and it's a match made in heaven!


Read about how I judged those books (sitting on top) by their covers. Yikes!

I will be playing at these parties this week.

Sunday, September 18, 2011

Zig Zag Footstool

I found a super cute footstool at an estate sale. I paid about $5 for it. It was in great shape, but the tapestry fabric was not my thing.


I reupholstered it with some leftover chevron fabric I had and spray painted the base black. After all that hard work, time to put my feet up!


There's even a little storage inside! What should I put in there?

I'll be linking to these parties this week.

Sunday, July 10, 2011

Childhood Dresser Redo

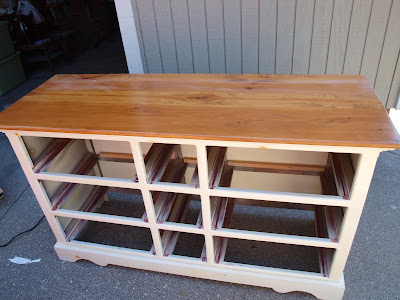
Man, I have been having a great summer so far! We just got back from an awesome trip to Nashville visiting some great friends. But it is now back to business and time to get some things done. This week I was busy refinishing my childhood dresser.

I don't have a good before picture, but if you look at this one, you can imagine what it looked like with the drawers. It used to have big wooden drawer pulls too.


Anyway, this dresser is now in our guest bedroom (which is undergoing an amazing makeover, by the way). I knew exactly what I wanted to do, but I needed my partner in crime to help me, so my Mom came over.

We sanded the top and then we were going to stain it a dark jacobean color, but it didn't look good. (It kind of turned out leopard print, which my inner sixteen year old secretly LOVED, but it wouldn't match the look of the room.)


So, we sanded it AGAIN. This time we painted it with black paint, but we painted it lightly so that some of the grain still showed through. I love that look.


I plan to repaint the white to go over some of the wood knots, but I didn't feel like getting the white paint out. Two words: Lazy Summer.

That's all I'm going to show you until I reveal the rest of the room! I have some other neat things planned to show you too, perhaps a lamp shade re-do and a spray booth tutorial! Woot woot!

I will link to these parties this week.

Sunday, May 22, 2011

Plant Stand Re-do

A few weeks ago, we went on a crafting field trip of sorts. We headed over to the Allegan Antique Market. It was SO cool! I scored tons of awesome loot (more on this later). That's where I found this plant stand.

Great bones. Not so great color.

So I painted her up and made her purdy.


So adorable. It's amazing what paint color can do!

I'll link up to these parties this week.

Sunday, May 8, 2011

Refinished Footstool

I scored an awesome deal on this old footstool. This is what it started out looking like:

And it even opens- look how cute!

But this top part of it... I don't like it so much.

So I took it all apart.

I sanded, cleaned and painted the bottom of it a light yellow color. I removed the old fabric from the top.

I used the old fabric to measure and cut a new cover.

I then stapled it on with the staple gun.

I put it all back together.

When you're all done, put yer feet up!

Too cute! What treasures can I store inside?

Stay tuned for some other vintage treasures I am refinishing. Until then, I will be linking up to these parties this week.

Wednesday, October 6, 2010

Black and Decker

GUESS WHAT? Black and Decker contacted me to ask me to submit a tutorial for their Projects and Advice Experts! I am so excited for this opportunity. They wanted me to submit a step-by-step of the Red Chair Makeover. You can read what I did here.


What a fun thing to do. If you are looking for inspiration or advice, check out Black and Decker's website today! It's really cool.

Sunday, September 19, 2010

Red Chair Makeover

I have been fixing up a crafty area in my house for awhile now. I decided I needed to refinish a chair that I could set things on sit in when I craft.

I found this old chair at a Salvation Army.

I removed the cushion and sanded the chair.

I wanted to paint it a glossy red color.

I put a couple coats on it...

While that was drying, I ripped off the old cushion.

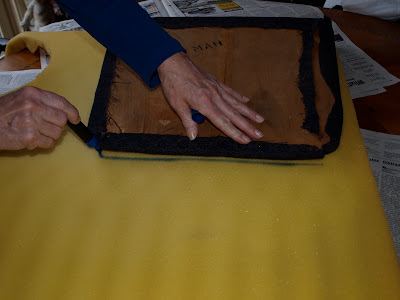
I traced it on the new (recycled) foam I was going to use. (My mom helped me, thanks Mom!)

Here are all the layers.

Time to staple everything together.

Trim it up.

Staple on the fabric.

Trim it up again.

Put it all back together.


A lovely place to sit.

Related Posts with Thumbnails